Building My BFH (warning - many pictures)

WaltBasil
Everyone, Registered Users Posts: 1,675
Thought I'd share this with you all. I started this project back in December of 2012 and had it operational in July, technically completed in August. Building it was easier than I expected. The detail is the hardest part.
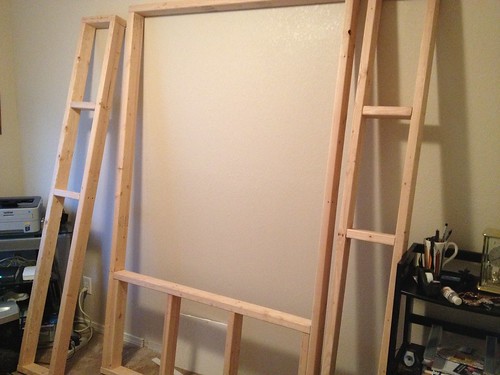
These are the frames I built for the front and sides.

Frames are clamped so I can determine how much of the carpet to remove.
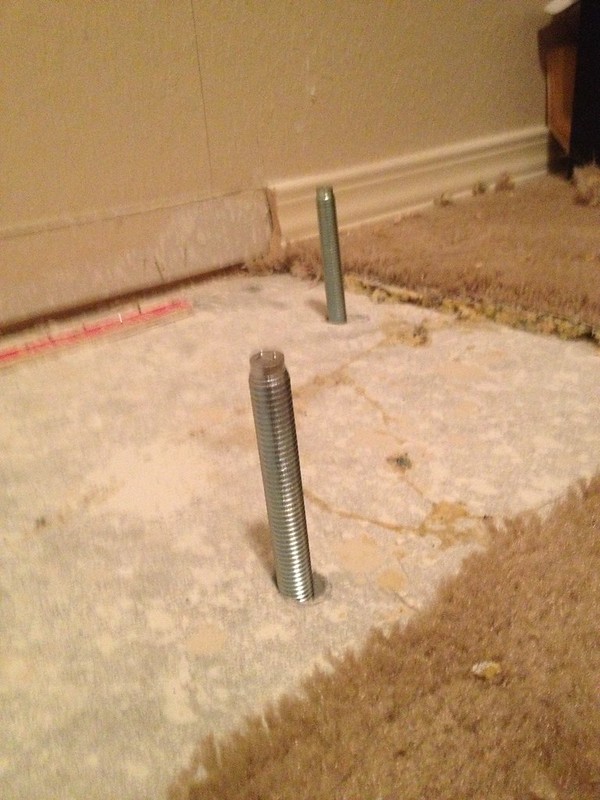
Carpeting removed. Holes drilled for anchors. Anchors installed.
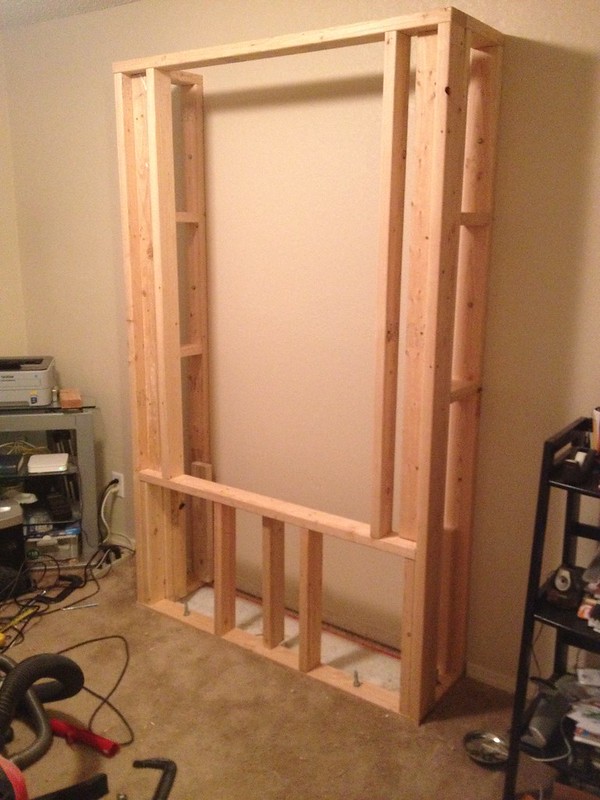
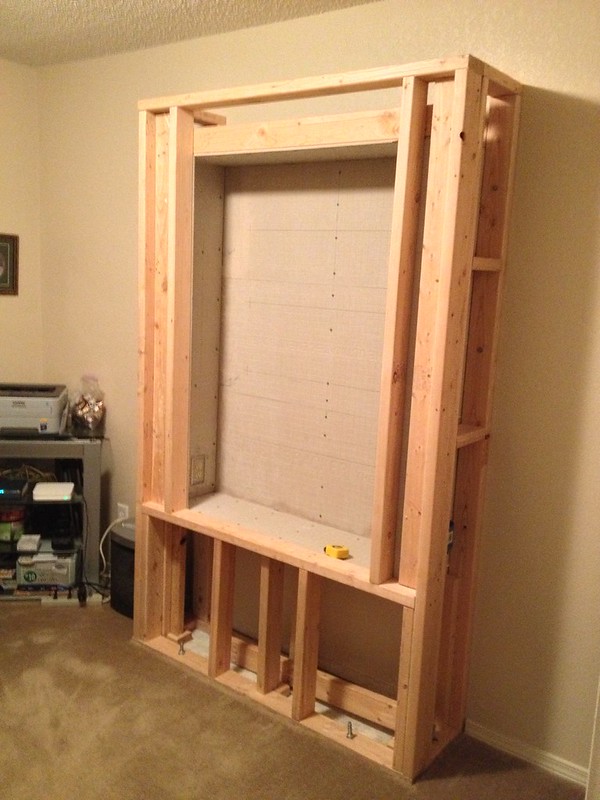
Frame put together and mounted to floor anchors. Bolted to wall studs in the back.
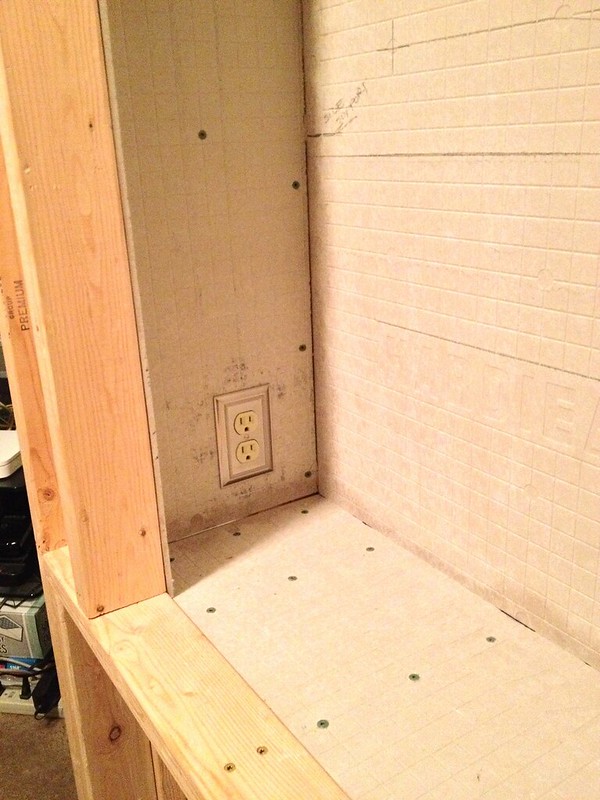
Cement backerboard is used for the moisture barrier. Silicon seal (for bath and tubs) used in all the seams. Electric outlets on each side at the bottom. This particular outlet is always powered (for the humidifier), the one on the right side will be on the same switch that powers the interior lighting (if further interior lighting is wanted in the future).
Step away view of cement backer inside.
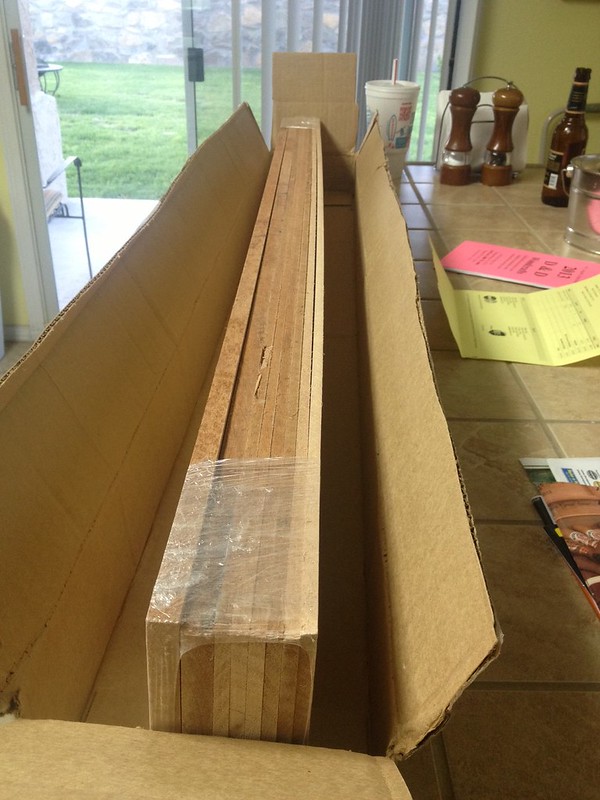
One of my shipments of Spanish Cedar. 1/4 inch thick. 4 foot boards. some 3 inch, some 5 inch wide. I cut them into 1 foot tiles and bevel a 45 degree edge all around. There is also some half inch thick boards that I will use to make half inch square poles. These will be the corner seams and support for the shelves.
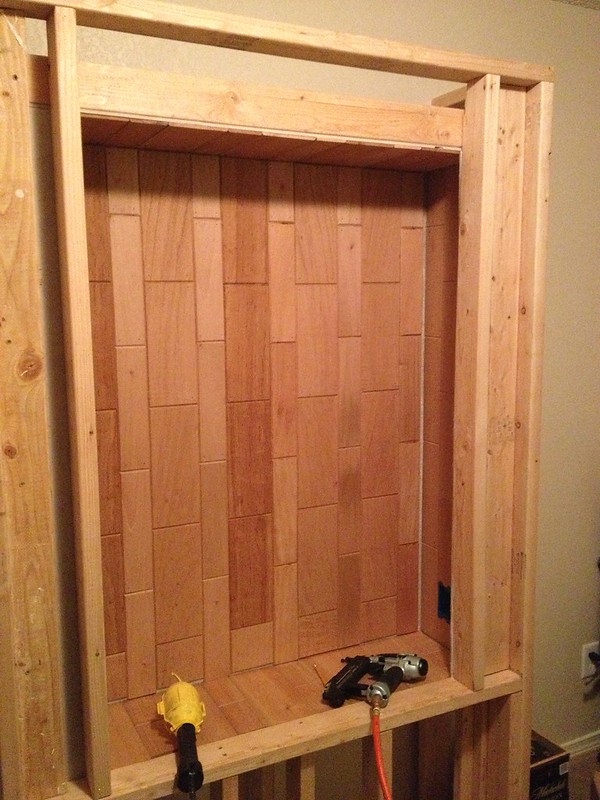
The Cedar tiles are then mounted offset. The beveled edge I routed into them really make them all stand out on their own.
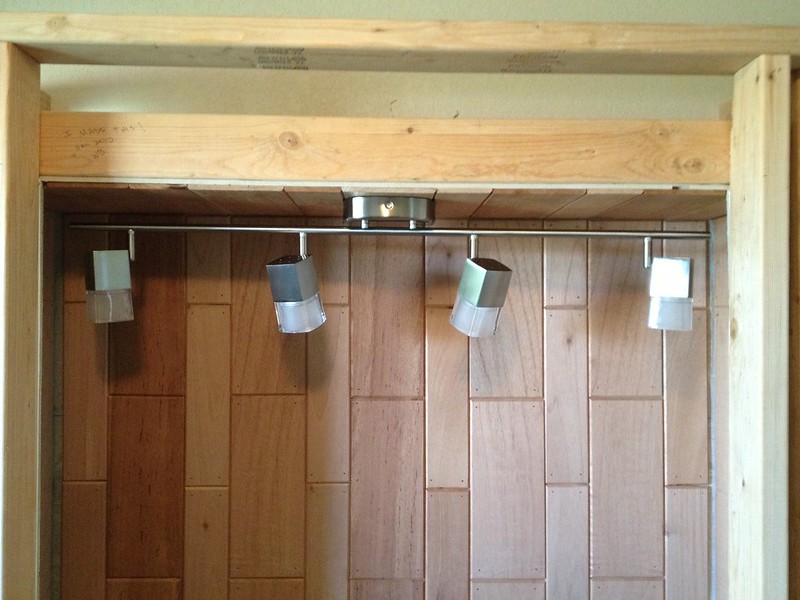
Interior lights are installed. Original lights I had planned were like heat laps at a fast food restaurant. Good thing I decided to try them out prior to installing. Original plans called for recessed lighting, but I couldnt't find any with LEDs that I liked. These turned out beautiful I think.
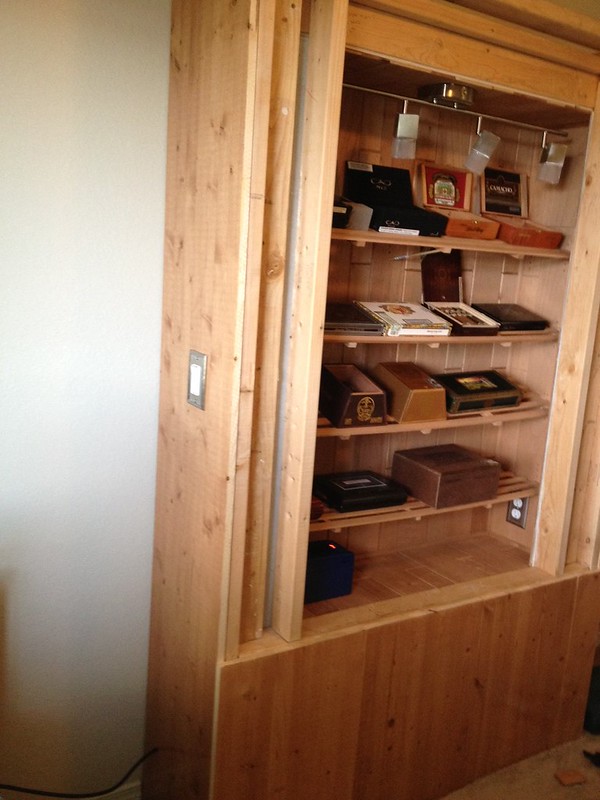
Shelves made and installed. Each is capable of being moved up or down about 5 inches. If you look close, the corner seams are now filled in with the half inch square poles. Exterior wood (pine) is stained, finished, and mounted. Power switch for the lights on the left side. Boxes thrown in to see what it might look like one day. Humidifier in the lower left.
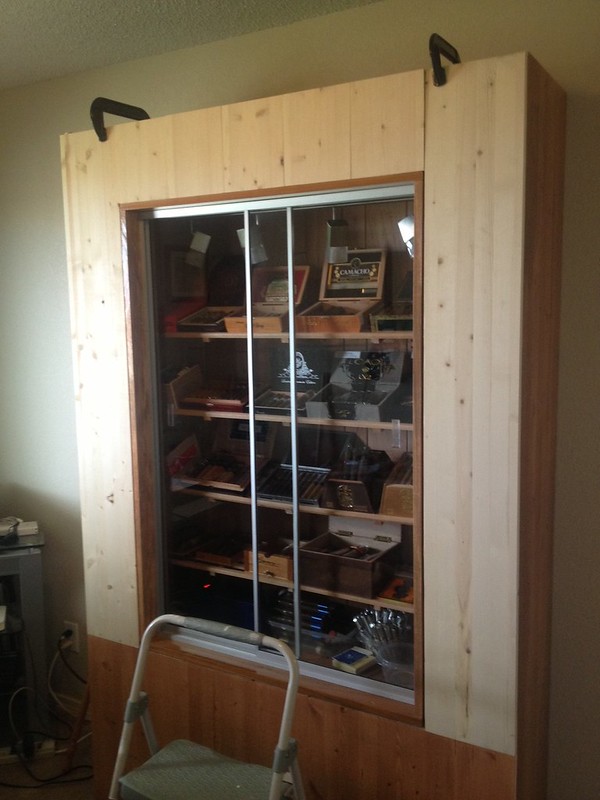
I had a local glass company custom make me some sliding glass doors. Once I had them, I built a frame they would fit into, mounted the frame into the humidor. Mounted the glass. Clear silicone seal placed around the aluminum frame on the inside. Weather stripping mounted inside the glass door jams. More weatherstripping attached to the outter glass pane that makes rigid contact with the inside pane. After about a week, humidity stays at 75 at the bottom and 66 at the top. Installed an additional fan (runs constantly) for better circulation and I achieve 75 bottom 69 topside. At this point it is fully functional and I begin using it. Pre-finished exterior wood clamped on. Time to finish this puppy!
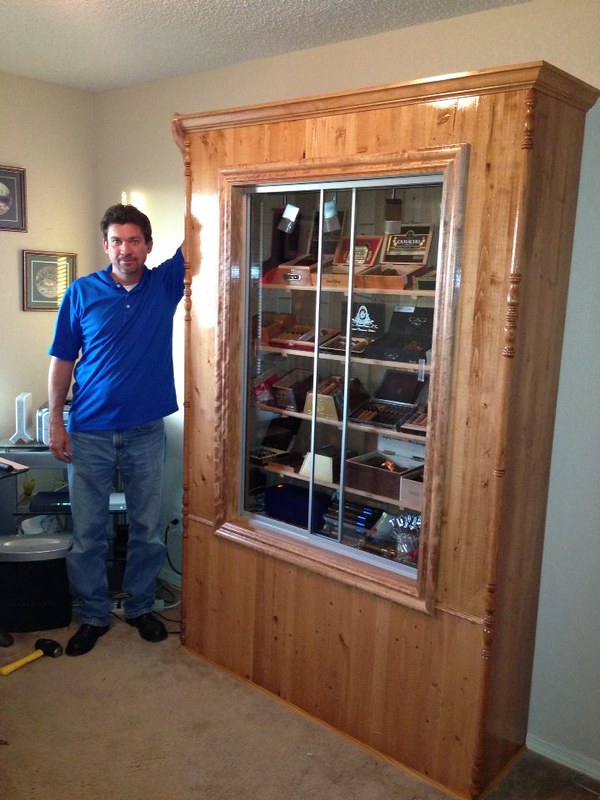
Finished Product! Trim applied all around the exterior to hide the seams mainly - but also makes it look kind of fancy. Insert Tim the Toolman's "Oh Oh" here.
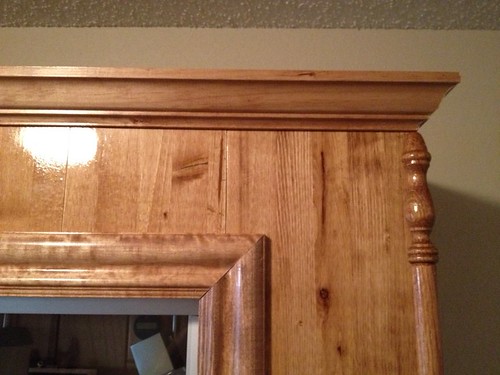
Close up of the upper trim.
I can't take credit for the staining and finishing. My lovely wife did all that. She loves to stain. I don't. Perfect team.
These are the frames I built for the front and sides.
Frames are clamped so I can determine how much of the carpet to remove.
Carpeting removed. Holes drilled for anchors. Anchors installed.
Frame put together and mounted to floor anchors. Bolted to wall studs in the back.
Cement backerboard is used for the moisture barrier. Silicon seal (for bath and tubs) used in all the seams. Electric outlets on each side at the bottom. This particular outlet is always powered (for the humidifier), the one on the right side will be on the same switch that powers the interior lighting (if further interior lighting is wanted in the future).
Step away view of cement backer inside.
One of my shipments of Spanish Cedar. 1/4 inch thick. 4 foot boards. some 3 inch, some 5 inch wide. I cut them into 1 foot tiles and bevel a 45 degree edge all around. There is also some half inch thick boards that I will use to make half inch square poles. These will be the corner seams and support for the shelves.
The Cedar tiles are then mounted offset. The beveled edge I routed into them really make them all stand out on their own.
Interior lights are installed. Original lights I had planned were like heat laps at a fast food restaurant. Good thing I decided to try them out prior to installing. Original plans called for recessed lighting, but I couldnt't find any with LEDs that I liked. These turned out beautiful I think.
Shelves made and installed. Each is capable of being moved up or down about 5 inches. If you look close, the corner seams are now filled in with the half inch square poles. Exterior wood (pine) is stained, finished, and mounted. Power switch for the lights on the left side. Boxes thrown in to see what it might look like one day. Humidifier in the lower left.
I had a local glass company custom make me some sliding glass doors. Once I had them, I built a frame they would fit into, mounted the frame into the humidor. Mounted the glass. Clear silicone seal placed around the aluminum frame on the inside. Weather stripping mounted inside the glass door jams. More weatherstripping attached to the outter glass pane that makes rigid contact with the inside pane. After about a week, humidity stays at 75 at the bottom and 66 at the top. Installed an additional fan (runs constantly) for better circulation and I achieve 75 bottom 69 topside. At this point it is fully functional and I begin using it. Pre-finished exterior wood clamped on. Time to finish this puppy!
Finished Product! Trim applied all around the exterior to hide the seams mainly - but also makes it look kind of fancy. Insert Tim the Toolman's "Oh Oh" here.
Close up of the upper trim.
I can't take credit for the staining and finishing. My lovely wife did all that. She loves to stain. I don't. Perfect team.
0
Comments
-
This is AWESOME.El Paso, huh? I'm on my way.0
-
Fantastic looking piece! What's the cubic size inside and how many man-hours do you suppose it took?0
-
allsmokedup:Fantastic looking piece! What's the cubic size inside and how many man-hours do you suppose it took?
Thanks. I call it 20 cubic feet. Like a 998cc is called a 1000. ;-) Man hours I have no idea. If I had everything I needed at once, I could probably do it in a week. The second time around. haha. After learning what NOT to do.0 -
holy *** man......that is impressive. Something for all of us to strive toward.0
-
Psh..no way my wife is going for that.Time to hire a hitman..brianetz1:holy *** man......that is impressive. Something for all of us to strive toward.0 -
Rain:This is AWESOME.El Paso, huh? I'm on my way.
Fort Hood eh? That's possible. I rode out there July 2012 for some recertification. Took leave around it. Had a great time. Went to Austin and San Antonio.
0 -
That's the nicest cabinet I've ever seen. You should consider making humidor as a business. Absolutely gorgeous.0
-
+1 very niceRain:This is AWESOME.El Paso, huh? I'm on my way.0 -
Man Walt that is truly impressive and my hat is off to you sir! Incredibly fine craftsmanship and loved watching to progression of the build! I've been a small time craftsman for a while and done a number of projects myself but nothing like this or even close! Absolutely amazing work and thanks for showing!0
-
wow. i love you0
-
Walt,meet Jiunn he is our resident perv. Perv, meet Walt... Now make him feel even more uncomfortable and tell him just how much you realllly love him :Pjliu:wow. i love you0 -
90+ Irishman:
Walt,meet Jiunn he is our resident perv. Perv, meet Walt... Now make him feel even more uncomfortable and tell him just how much you realllly love him :Pjliu:wow. i love you
umm... awkard...? LOL Naa. I get it. He can't have the humidor though.0 -
tell me you love me back90+ Irishman:
Walt,meet Jiunn he is our resident perv. Perv, meet Walt... Now make him feel even more uncomfortable and tell him just how much you realllly love him :Pjliu:wow. i love you0 -
jliu:
tell me you love me back90+ Irishman:
Walt,meet Jiunn he is our resident perv. Perv, meet Walt... Now make him feel even more uncomfortable and tell him just how much you realllly love him :Pjliu:wow. i love you
I love you back, man!0 -
oh my!WaltBasil:jliu:
tell me you love me back90+ Irishman:
Walt,meet Jiunn he is our resident perv. Perv, meet Walt... Now make him feel even more uncomfortable and tell him just how much you realllly love him :Pjliu:wow. i love you
I love you back, man!") xoxo 0
xoxo 0 -
eff this. I saw him first you Jerk!jliu:wow. i love you0 -
twinsies funsiesdanielzreyes:
eff this. I saw him first you Jerk!jliu:wow. i love you") 0
0 -
Sweet humi Walt. Very well done! I'm envious.0
-
That is beautiful work. I think you found a new calling.0
-
jliu:
twinsies funsiesdanielzreyes:
eff this. I saw him first you Jerk!jliu:wow. i love you
Gentlemen. We can settle this civilly. Which of the two of you is rumored to be the Stogiestand Man? That man will get the true love.
0 -
I never liked you from the get go. (daniel is the ss man).WaltBasil:jliu:
twinsies funsiesdanielzreyes:
eff this. I saw him first you Jerk!jliu:wow. i love you
Gentlemen. We can settle this civilly. Which of the two of you is rumored to be the Stogiestand Man? That man will get the true love.0 -
Hahahahaha, see told you he's a perv, jumps from one person to the next just like a perv :Pjliu:
I never liked you from the get go. (daniel is the ss man).WaltBasil:jliu:
twinsies funsiesdanielzreyes:
eff this. I saw him first you Jerk!jliu:wow. i love you
Gentlemen. We can settle this civilly. Which of the two of you is rumored to be the Stogiestand Man? That man will get the true love.0 -
Very nice Walt. I have aspirations of doing something similar in the next couple years myself. Seeing your process was great for helping picture what I would like to do. Thanks! Also, be careful with the Month and DZR. They both are nothing but trouble!0
-
This thread shows porn!! Shut it down!0
-
That is just amazing! Thanks for sharing the details. If you did it again would you change anything?0
-
Looks good Walt! Next time you make it up to Austin hit me up and we'll burn one down!0
-
Three is company.onestrangeone:Looks good Walt! Next time you make it up to Austin hit me up and we'll burn one down!0 -
The more the merrier! you do have a standing invatation for whenever!Rain:
Three is company.onestrangeone:Looks good Walt! Next time you make it up to Austin hit me up and we'll burn one down!0 -
thats some serious talent right there~! man we need to burn one so I can check that fine wood work out!
Aj0 -
Very cool. Thanks for sharing that.0